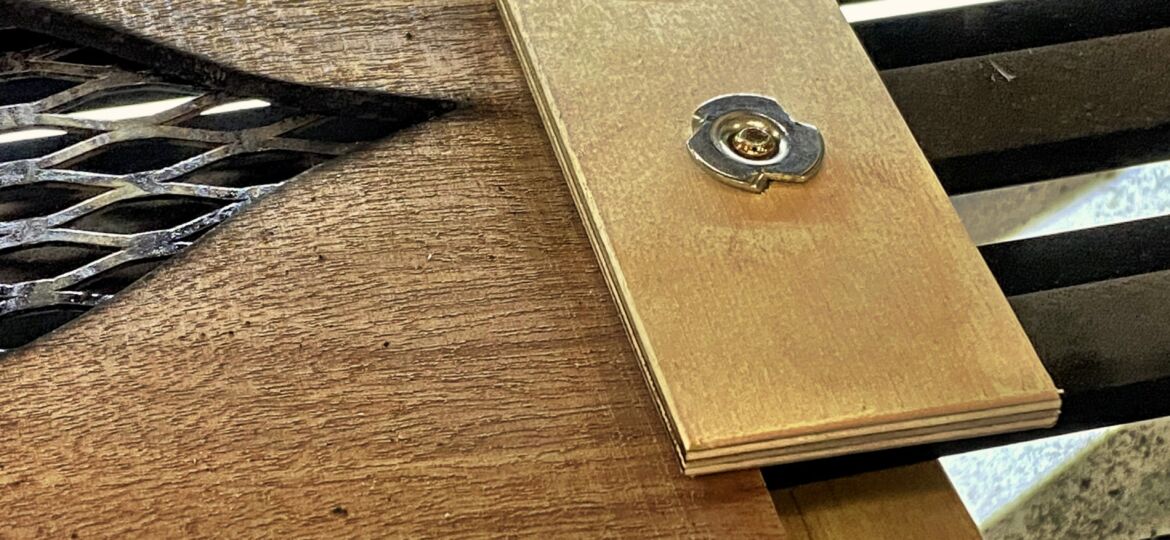
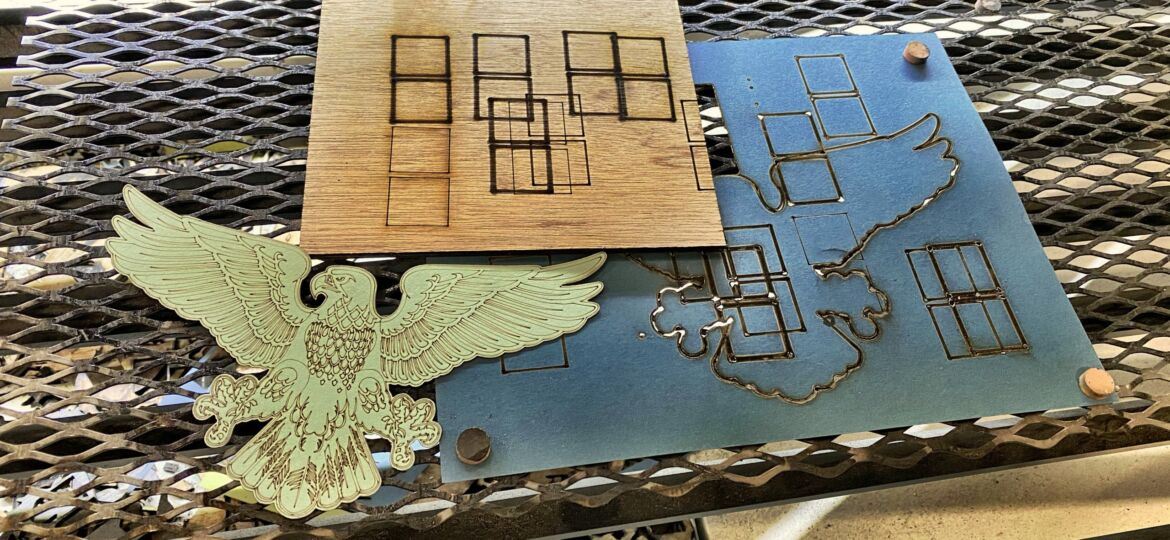
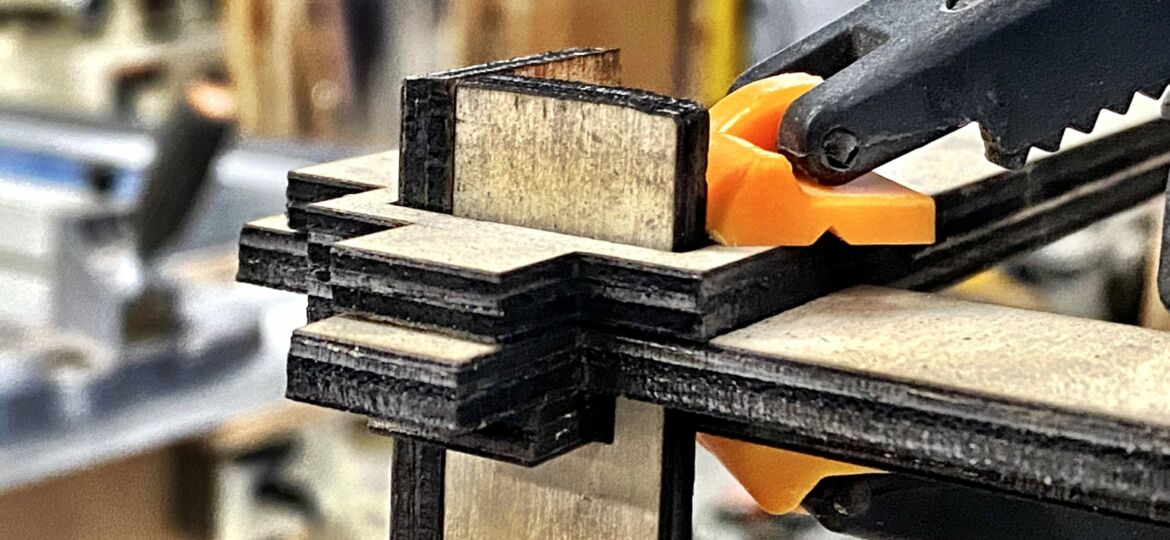
March 8, 2020 Shop Log

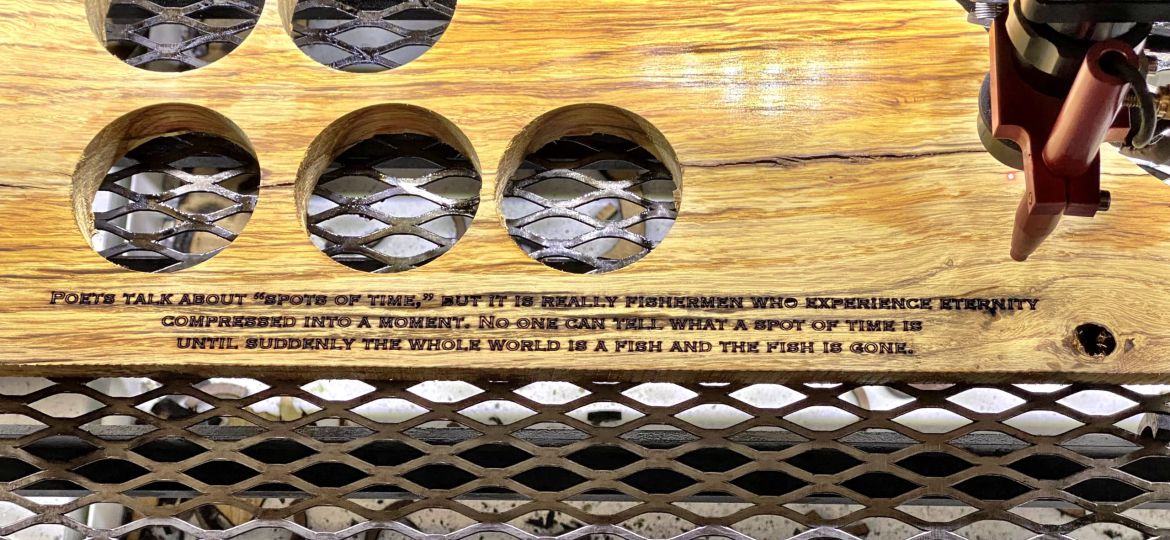
I began to notice diminishing performance with my RTJ-1390I Laser Cutter and realized that I hadn’t cleaned the mirror and lens since receiving it. Over the course of use, soot accumulates on the mirror and lens and need to be cleaned regularly in order to maintain the intensity of the laser, so last week, I began cleaning the mirrors and figured out how to access the focusing lens and cleaned that.

However, after putting the machine back together, I no longer received the clean sharp cuts I has been getting before cleaning. I emailed the factory in China for support, and they recommended checking the mirror alignment. My initial thought was that the machine travelled across the ocean for a month and came out of its crate in working order and that my brief and light cleaning did not throw off the alignment. I wanted a working machine and knew that sooner or later I would need to master the skill of optics alignment, so I started following the YouTube video the factory sent me on how to align the mirrors.

I checked and rechecked my alignment. The thing about optics alignment is that you can always make it the slightest bit better, and my perfectionist tendencies do not play out well in this scenario. Finally, I convinced myself that mirror alignment was not the cause of my problem, so I turned my attention to the focusing lens. I took apart and reassembled the lens tube several times. I cleaned the lens several times. Still nothing resolved the issue.

Now I want to point out the power of human companionship and how it makes us better. My friend Terry yesterday stopped by. He has no expertise in laser cutters; however, his mere presence forced me to slow down and explain what the problem was and what I was doing to try an solve it. He made me question all of my assumptions, which, when by myself, I just took as givens.Together we went through those assumptions.

  • What happens if I flip the lens? No effect. OK that is not the issue.
  • Remove the nozzle to make sure that it is not interfering with the path of the laser. Nope, cuts are still the same.
  • Change out the lens with a spare lens. Nope.
  • Measure the laser tube, nozzle and the lens place inside the assembly. Does it work with 63.5mm focal length of the lens? Yep. Measured twice. Checked my math twice. On paper, it works.
  • Move the laser tube assembly closer to the work piece to shorten the distance of the lens. The autofocus pen probe gets in the way. Set it off to the side. Nope. Still bad cuts.
  • Need to move the laser tube assembly closer to the work piece. Remove the nozzle and set that off to the side. Lower the lens even closer to work. Wait a minute. The cuts are sharper.
  • Move the laser tube assembly even closer. The cuts are even sharper. But I can’t get the nozzle and pen probe back onto the laser tube assembly. This doesn’t make any sense. It worked before with them on, before I cleaned the mirrors and lens. The position of the lens is fixed inside the tube. Set up and secure against the stop inside the tube.
  • Wait a minute. What if I installed the lens on the bottom of the stop rather than on top of the stop? SHIT! THAT WORKS! The setup is just like it was.

Progress is a collaborative effort.

February 16, 2020 Shop Log

Measuring for kerf

I realized that I was accounting for the kerf of the laser cutter, or the amount of material removed during the cut. While the laser cutter removes little material during cutting, nevertheless, it still removes some, enough to affect the tightness of joints. How I measure the kerf is draw a 100mm by 100mm square in Lightburn and then cut it out of the material I am working with. The kerf will be different for different materials.Then after the cut measure the dimensions of the cut square with calipers. The square will be slightly smaller than the 100mm drawn. The difference is the kerf. In this case, the kerf for 5mm thick plywood is 0.26 mm.

February 14, 2020 Shop Log

Designing with the iPad

A snow storm hit yesterday, dumping over a foot of snow and some across the area. I grabbed my iPad and Apple Pencil and started designing an andon lantern frame, using Shapr3D. My idea is to create a standard frame with the ability to easily install and swap out custom panels..

First Rendition

Using some scrap plywood, I cut out my first rendition of my idea. On the laser cutter. While on the right path, I still had issues to solve, such as how to easily secure the bottom and top pieces to the upright (hence the use of rubber bands to keep the frame together). I also wanted the two pieces that made up the corner uprights to be better aligned with one another.

Mistakes were made.

I thought I would integrate finger joints along the vertical corner of the uprights to provide be alignment of the corner, but I learned during the prototyping process that I designed the joint incorrectly.

Progress

At the top and bottom of the frame, I created panels with holes to accommodate the angled uprights, which locked the uprights in position. Solid side panels would also add support to the frame. Progress was being made, but there was still more tweaks that needed to be made.

I figured out where I went wrong with my upright finger joints and made the necessary correction. I also added small corner caps to provide some symmetry to the corner overhangs.

January 3, 2020 Shop Log

I reused the wheel base for the dust collector, which I no longer needed since I mounted it to the wall. I added sides to the base to create a rolling bin that fits perfectly underneath the RTJ-1390I Laser Cutter. I will use it to store scrap material for the laser cutter.

Sindhu Kuhle and Patty Barrett came over to finish their quote signs this morning. Today they applied finishing wax to their signs. They went from their ideas laid out on Easel to a physical sign in two classes. They seemed pleased with the end results.

I started cutting out the fly rod rack from the Oregon white oak boards on the X-Carve CNC Router

I ran a practice burn on a scrap piece of the oak. I think I want to engrave a Norman Maclean quote along the belly of the top trout.