July 20, 2019 Shop Log

It seems that the laptop I used to run the Shapeoko and K40 Laser Cutter and Engraver bit it the other day. It use to run the ChiliPeppr Serial-Port-JSON-Server, but I decided to move that over to an old Raspberry Pi I have laying around unused. The problem is that Pi hasn’t been maintained, and the updates to the OS are taking forever.
I mounted the Raspberry Pi on the Shapeoko table, next to the TinyG.
I managed to finally get the Pi updated and running. A scan of the local subnet found the Serial Port JSON Server on the Raspberry Pi and the USB port I connected the Raspberry Pi to the TinyG CNC Controller.
I finished my USB Battery Storage Tray. This should clean up the clutter in my office. Currently the battery are scattered about the desktop while charging. This should take up less room and make it easier to keep track of my batteries.

December 10, 2017 Shop Log

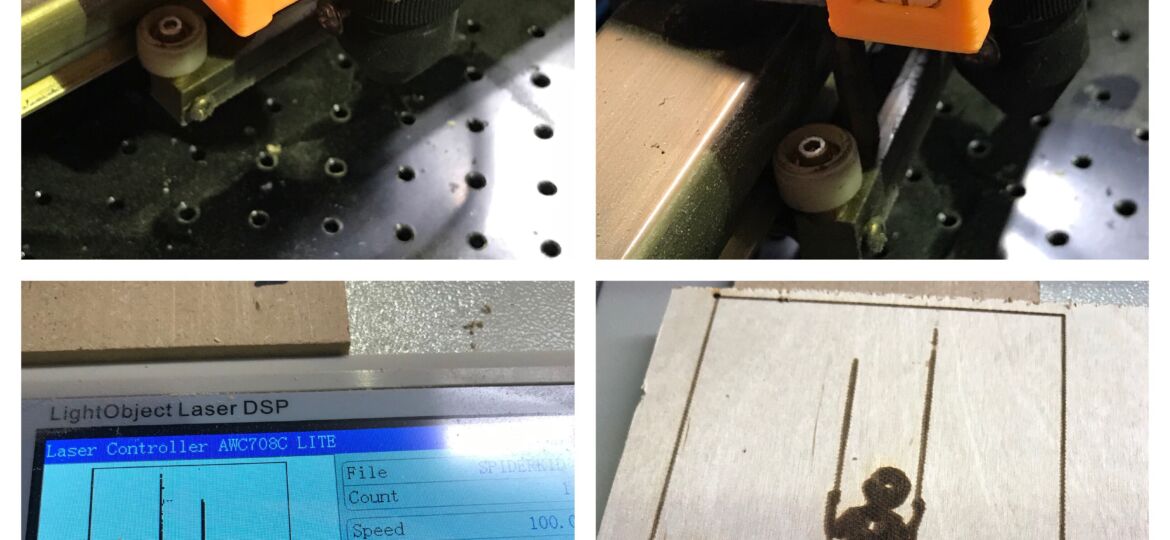
  • It has been a while since I have been able to putter in the shop.
  • I worked on aligning the mirrors in the K40 Laser Engraver and Cutter. I found an alignment tool on Thingiverse and 3D-printed it out awhile back.
  • I also ordered some 2mm balsa wood for targets, which I cut out on the Muse.
  • After aligning the mirrors, I performed a test engraving of Spider-Kid. The Harbor Freight dust collection blower I am using vibrates the K40, which moves the work piece. I had to hot-glue it to the bed. I will need to rethink exhaust venting.
  • In order to improve prints on the Stacker 3D Printer, I made an enclosure from PVC pipe and moving blankets.
  • Another addition to the MakerCave Art Gallery…

October 15, 2017 Shop Log

  • I had some fun with the Muse today. I discovered a living hinge generator website and made up a quick box.
  • I then worked on some more image engraving on the Muse.
  • I completed another CEIA Magnetometers Storage Pallet.
  • The Stacker 3D Printer is printing a K40 Laser Cutter Mirror Alignment Tool.
  • And another addition to the MakerCave Gallery…

January 29, 2016 Shop Log

  •  Last night, I sketched up a design for the water flow pressure sensor and then printed it out on the Printrbot Simple Metal. Unfortunately, I didn’t make the inside of the mount high enough and had to file away material in order to accommodate the sensor. For the future, I modified the SketchUp model by increasing the height by 2 millimeter from 32mm to 34mm.

    Water Flow Pressure Sensor Mount Installation

  •  Originally, I had planned to bolt the mount to the floor of the electronics cavity next to the laser power supply, but the mount was pretty and protected and could be left freestanding. Perhaps I will velcro it in place, but it works as is.

    Water Flow Pressure Sensor Mounted Inside the K40 Laser Engraver and Cutter

  • After work, I stopped in to look for my misplaced Leatherman. I hate when I do that, and no, I didn’t find it.
  • While there, I decided to hook up the Tekpower Digital Multimeter DT9602R to the Ubuntu Linux Laptop at the Electronics Workspace. Sorry, no photos. I forgot to take some. 
  • Luckily the laptop is old enough to have a serial port, so no need for a Serial-to-USB adapter. However, the enclosure around the computer end of the cable obstructed the end from being able to be plugged in. Luckily, it can be easily removed, and the cable could now be plugged in. Another design opportunity for the 3D printer.
  • I was also having difficulty connecting to the multimeter with the QtDMM software. However, I fixed that issue by running the program with the sudo command.
  • I need to research how to open the serial port to all users and QtDMM doesn’t need to ran under sudo.

January 28, 2016 Shop Log

  • I remembered to bring the crimpers back to MakerCave and finished the wiring for the K40 Laser Engraver and Cutter water flow sensor. I attached the female connectors to the water sensor and the ferrules to the WP (Water Protect) terminal and the Ground terminal for Laser1.

  • I entered the Manufacturer Parameters by pressing the Stop Button and then the Shift Button.

  • Then I entered Laser Parameters…

  • I changed Laser1 Water Protect setting from Close to Open.

  • I unplugged the water pump, turned on the K40 and pressed the Laser button. It works!

  • I also verified that the K40 works when the water pump is running.
  • Next create a mount for the water flow sensor…